Install Banalytics VMS on Windows
This guide walks through the complete installation of the Banalytics server on a Windows PC and its registration with the Banalytics web console. The process takes approximately 5 to 10 minutes on a standard broadband connection.
Prerequisites
Confirm all four requirements before starting the installation. The installer will fail if administrator privileges are missing or if the machine is offline during the JDK download.
Windows 10 or 11, 64-bit
The installer provides a Windows x64 package only. 32-bit systems are not supported.
Administrator privileges
The install script registers a Windows service and must be run as Administrator.
Active internet connection
The installer downloads JDK 21 (approx. 180 MB) during the installation process.
Banalytics account
A free account at console.banalytics.live is required to register the server in Step 3.
Open banalytics.live in your browser. The home page confirms you are in the right place.
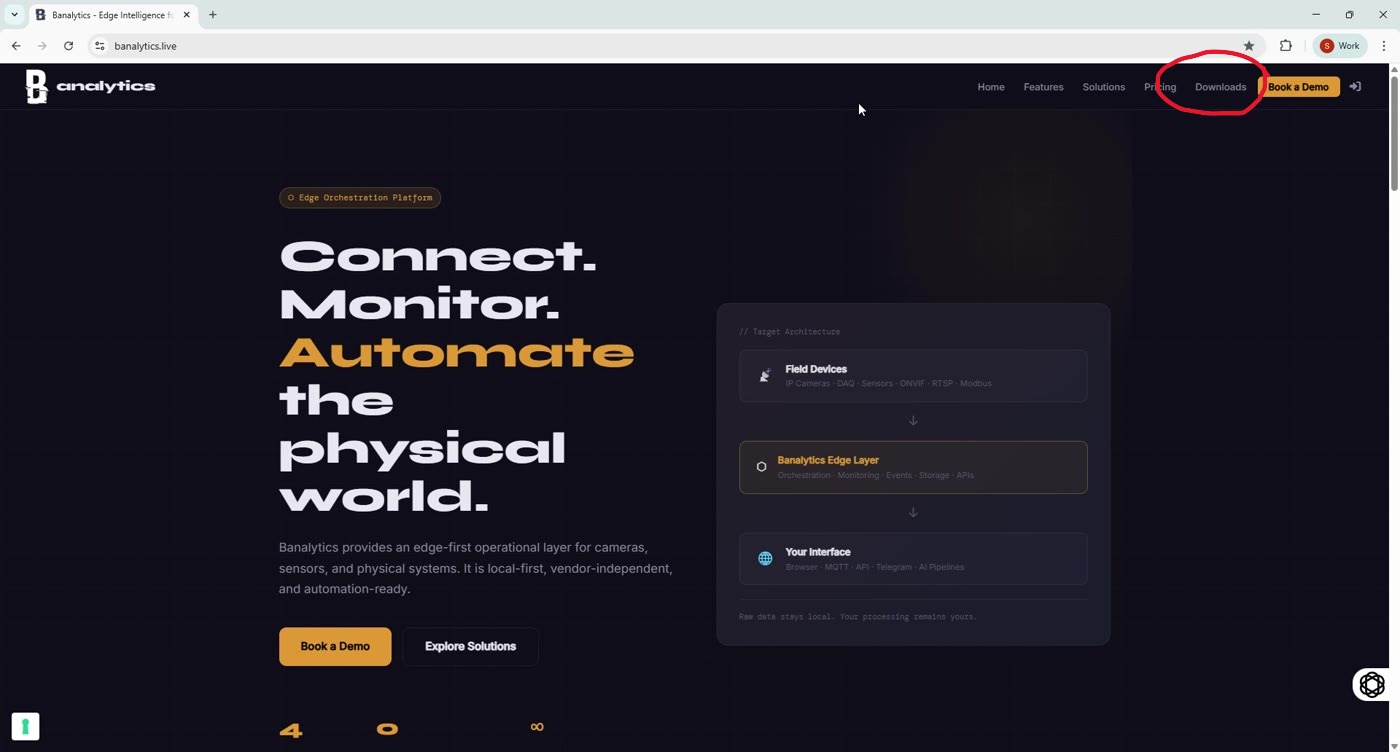
The Banalytics home page. Use the top navigation or scroll down to reach the Downloads section.
Click Downloads in the top navigation, or scroll down to the Downloads section. Three packages are listed: Windows x64, Linux x86_64, and Linux ARM 64. Click Download for Windows x64. The file windows-1.0.0.zip will be saved to your Downloads folder.
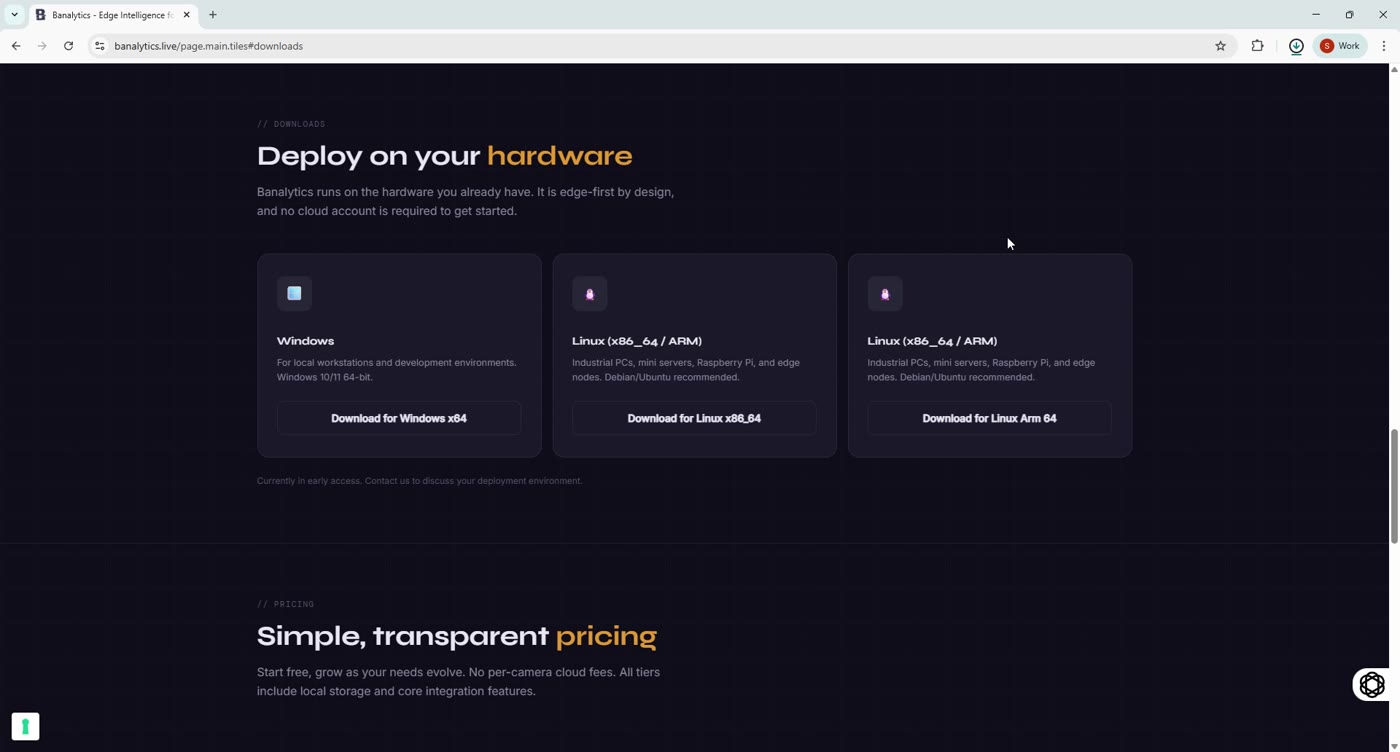
The Downloads section at banalytics.live/page.main.tiles#downloads. Click Download for Windows x64.
windows-1.0.0.zip. The version number shown on the site may be higher than in these screenshots. Always download the latest available package.
Locate and extract the ZIP file
Open your Downloads folder. You will see windows-1.0.0.zip downloaded from banalytics.live. Extract its contents to a permanent location on your C: drive. The recommended path is C:\banalytics-box. Do not run the installer directly from inside the ZIP archive.
Run the installer as Administrator
Inside the banalytics-box folder you will find several batch files. Right-click BanalyticsBox_Win64-install.bat and select Run as administrator. Windows may display a User Account Control prompt - click Yes to allow it. This is the only file you need to run.
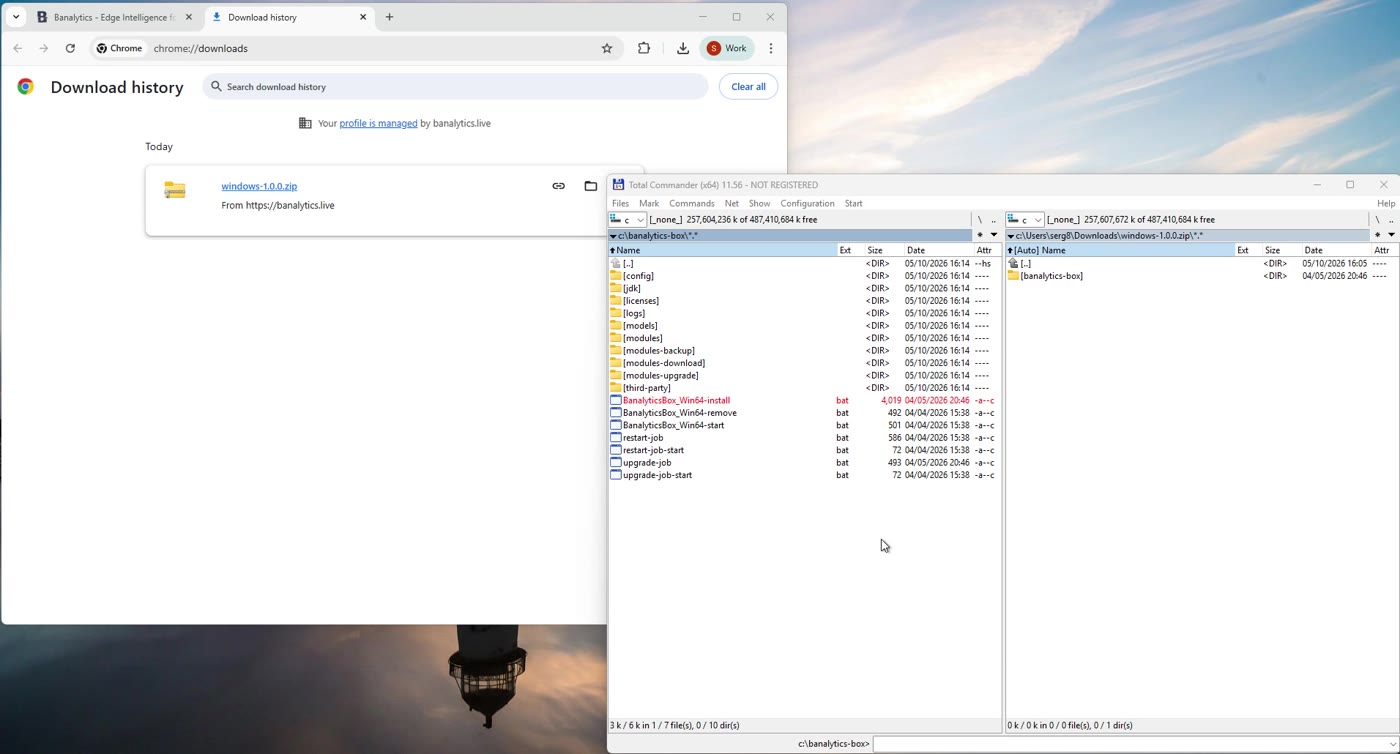
The banalytics-box folder. BanalyticsBox_Win64-install.bat (highlighted) is the only script you need to run.
Installer downloads JDK 21
A Command Prompt window opens. The installer first confirms that administrative permissions are present, then begins downloading Java JDK 21. A progress bar shows the download status. JDK 21 is approximately 180 MB - wait for the download to complete before closing the window.
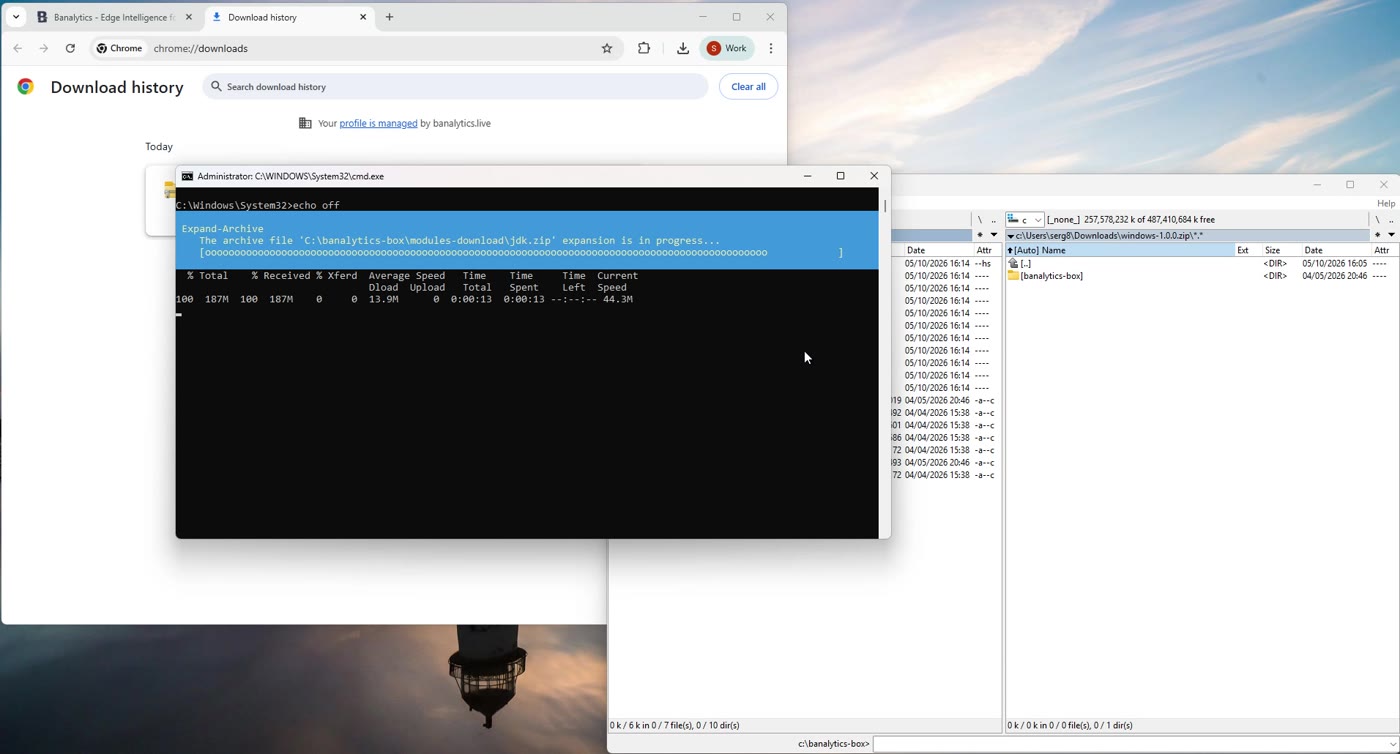
After downloading JDK 21, the installer expands the archive. The blue progress bar confirms the extraction is underway.
Service installation completes
Once the JDK is ready, the installer registers Banalytics Box as a Windows service, starts it, and verifies connectivity with a ping to 127.0.0.1. When you see the message Banalytics Box service is installed, the process is complete.
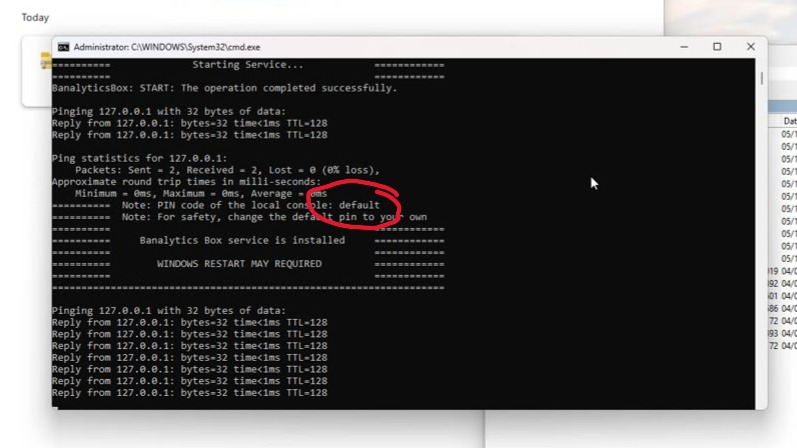
The installer confirms the service is installed and running. The 127.0.0.1 ping responses confirm the server is listening.
Verify the service in Task Manager
Open Task Manager with Ctrl + Shift + Esc, go to the Services tab, and find BanalyticsBox. Its status should read Running. This confirms the server is active and listening on port 8080.
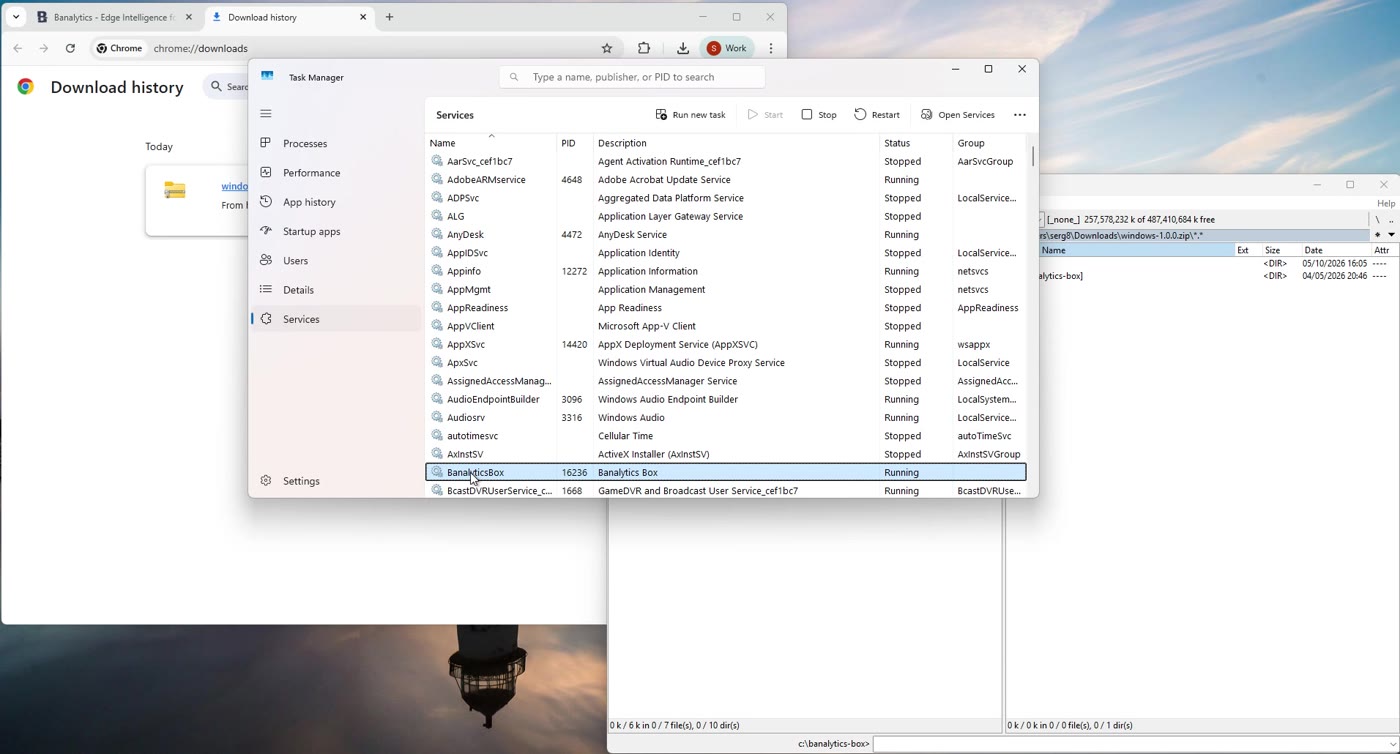
BanalyticsBox listed as Running in the Windows Services tab of Task Manager. PID is assigned once the service is active.
Open the local agent console
Open a browser on the same machine and navigate to http://localhost:8080. The Banalytics agent login screen appears. Enter the default PIN code shown at the end of the installer output and click Log in.
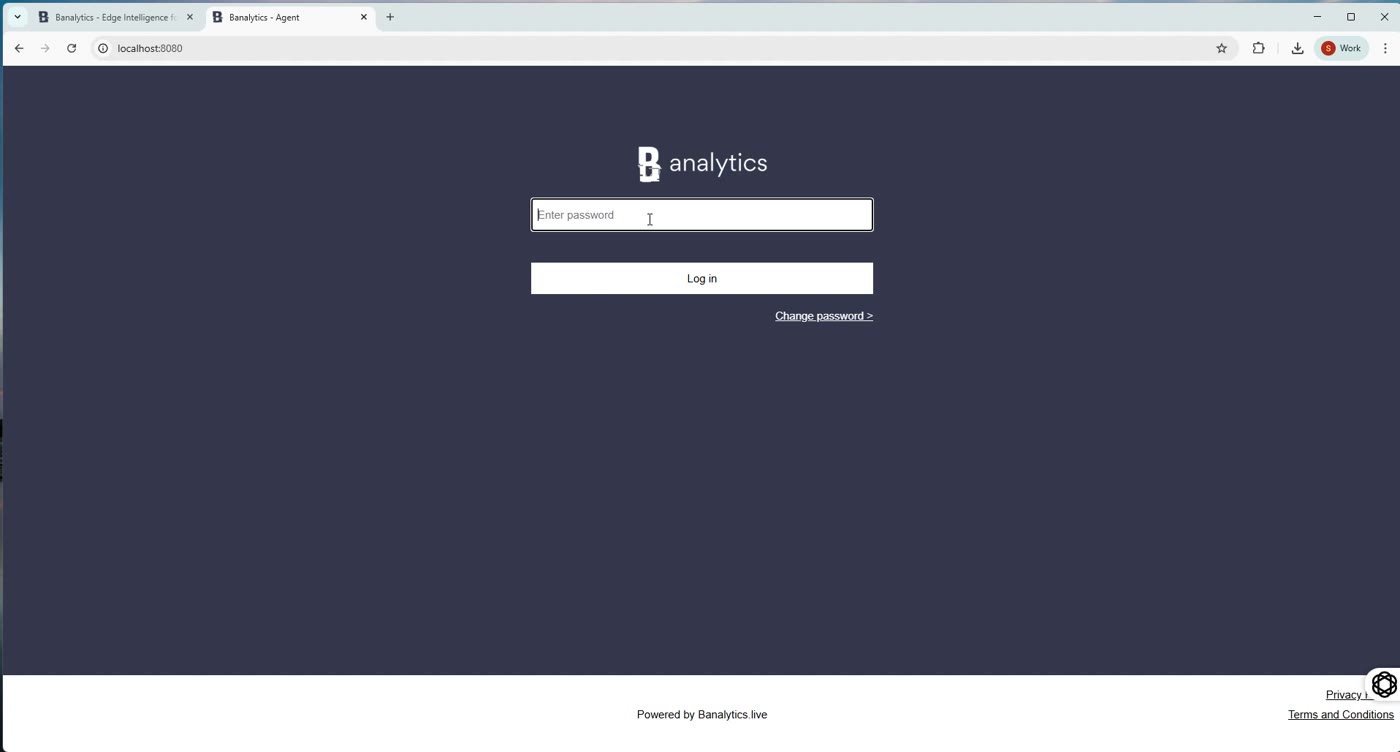
The local agent console at localhost:8080. Enter the PIN set during installation to log in. Use Change password to update it immediately.
Copy the server UUID
After logging in, the agent console shows the Product section containing the server UUID, for example 1da6a564-f6a9-4255-bb51-048a451cd6f9. The Agent network details section lists your network adapters and their IP addresses. Click the link Add server UUID to my Banalytics account.
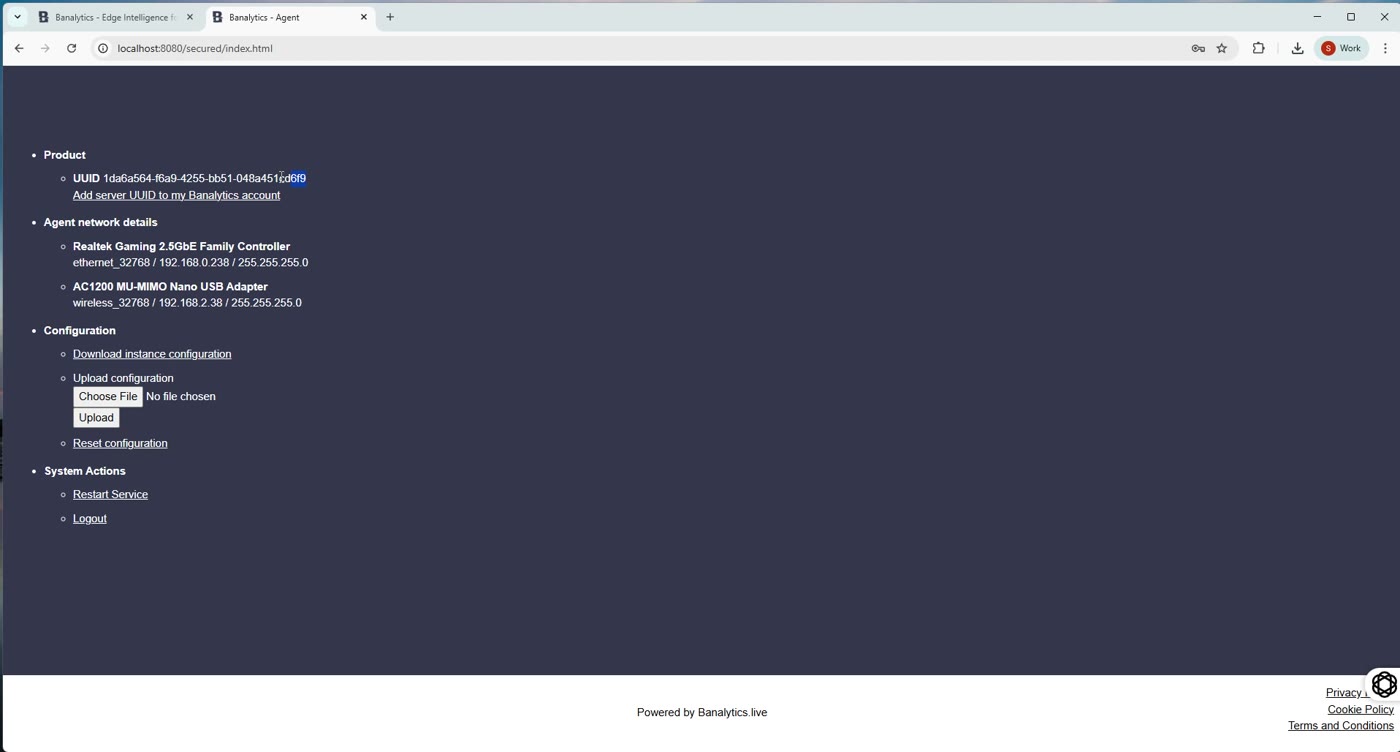
The agent console at localhost:8080/secured/index.html. The UUID and the Add server UUID link are in the Product section.
Add the server in the web console
Clicking the link opens console.banalytics.live. If prompted, log in to your Banalytics account. An Add server dialog opens, pre-filled with the UUID copied from the agent console. Confirm it is correct and click OK.
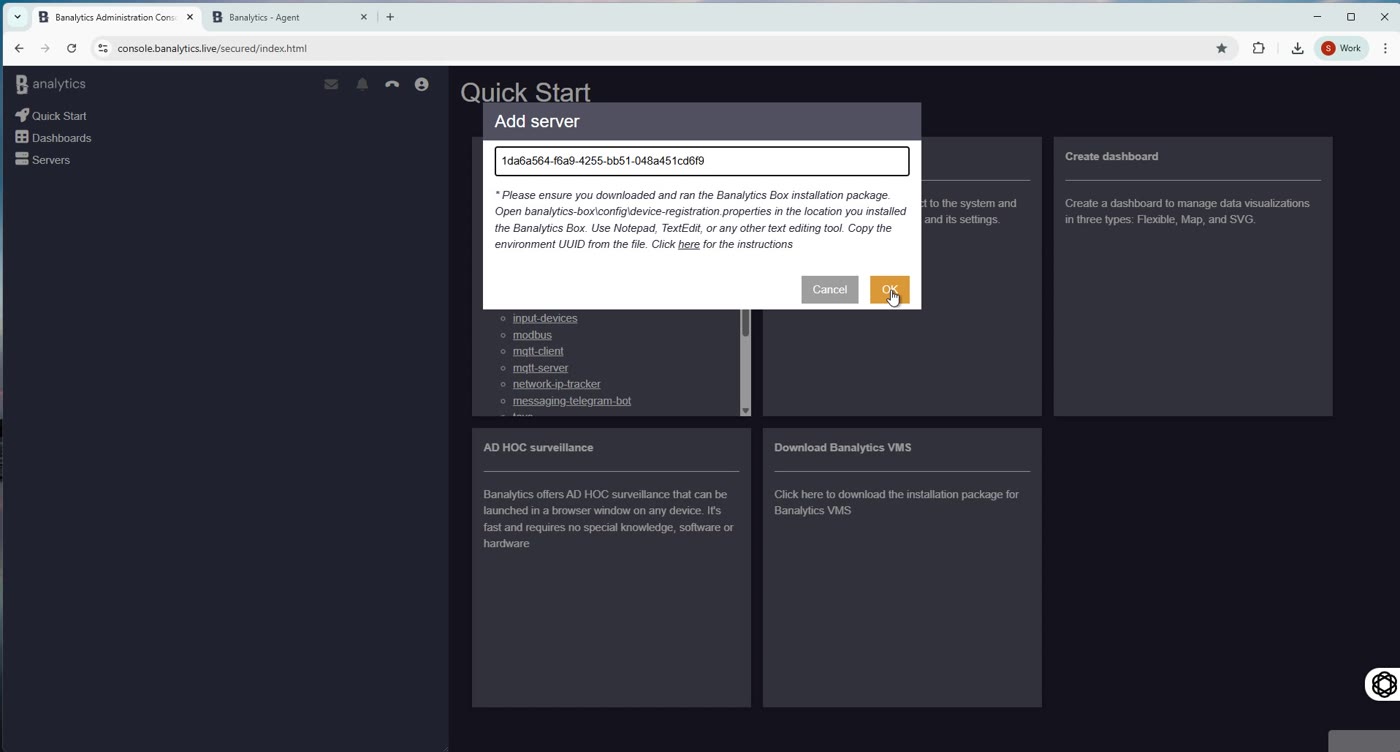
The Add server dialog in console.banalytics.live. The UUID is pre-filled. Click OK to register the server.
Server appears in the Servers list
The server is now registered. It appears in the left sidebar under Servers, identified by its UUID. The Quick Start panel on the right shows the Release info listing all installed modules.
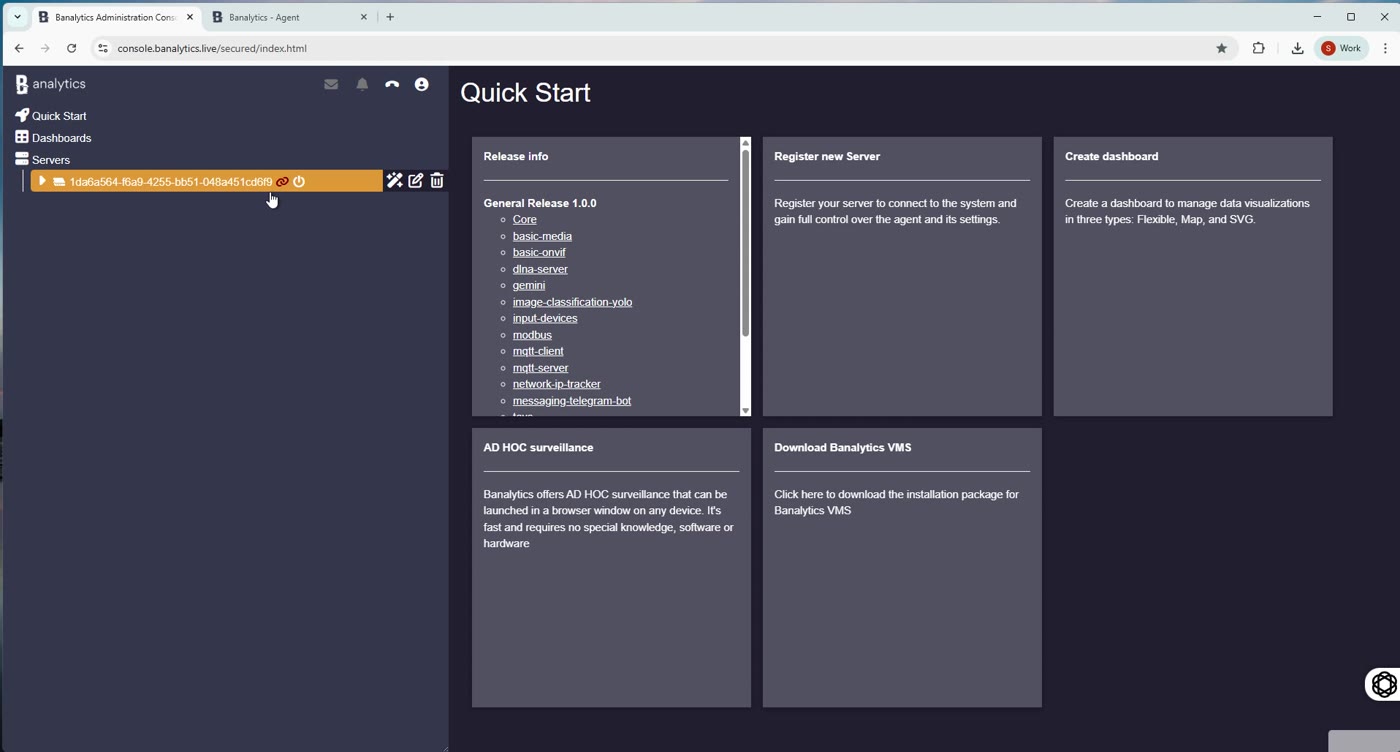
The server entry in the Servers list. It is highlighted in mustard, indicating it has just been registered and is awaiting its first connection.
Server shows as Connected
Hover over the server entry in the Servers list. A CONNECTED tooltip confirms the portal has established a live P2P connection to the agent running on your PC. The green dot next to the UUID is the permanent connection indicator.
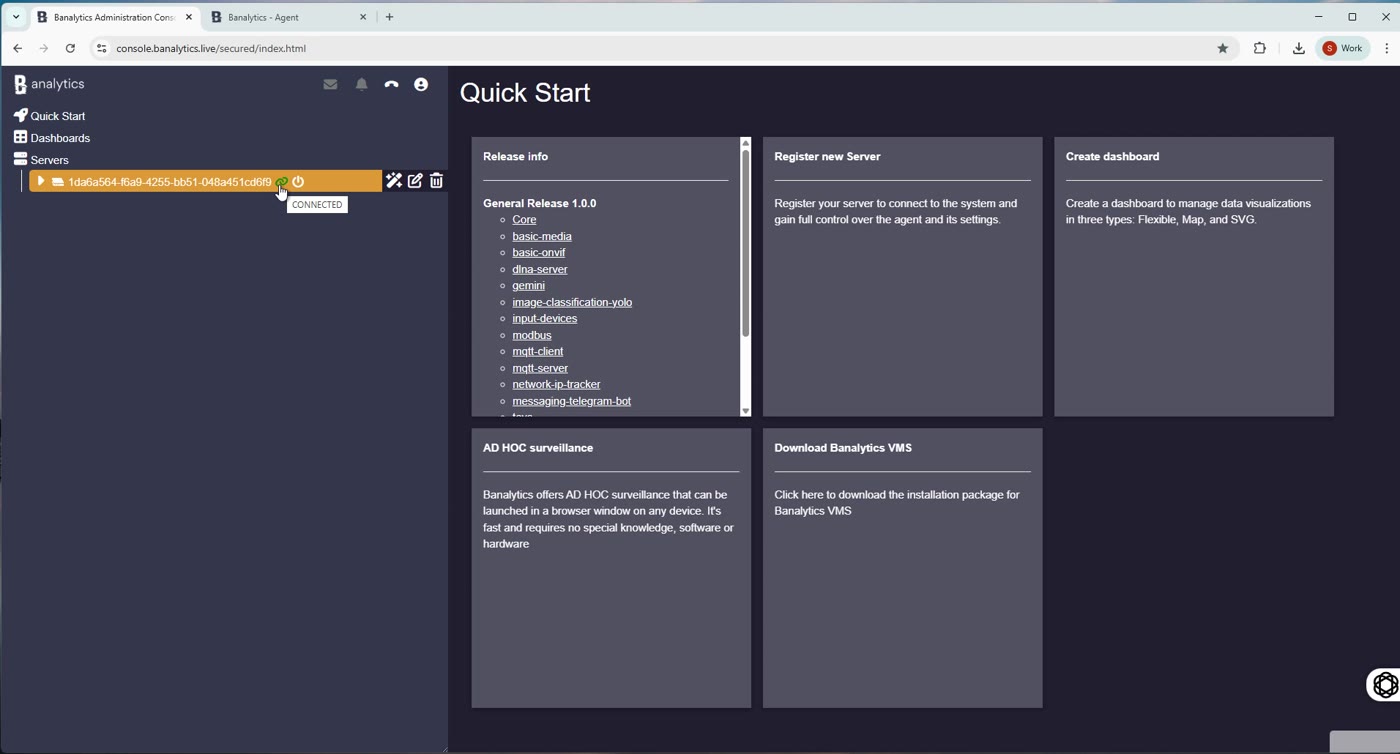
The CONNECTED tooltip confirms a live P2P connection between the portal and the local agent. The green circle indicates the server is online.
Enter the access code
When the portal opens the server for the first time, it prompts for an access code. Enter the PIN you set on the local agent and click OK. This authorises the portal to communicate with the agent. You will not be asked again on the same browser unless you clear your session.
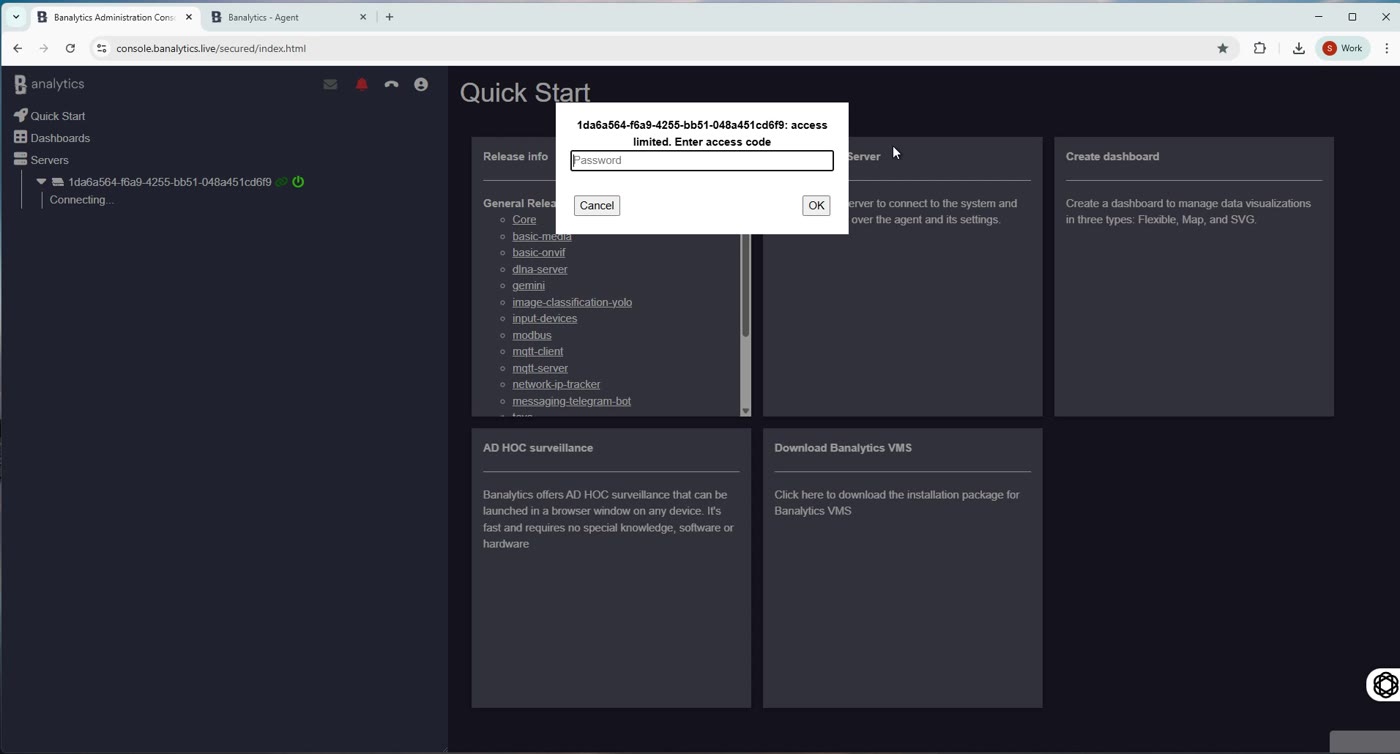
The access code prompt. Enter the PIN configured on the local agent at localhost:8080 to authorise the portal session.
Full component tree is now accessible
After authentication the left sidebar expands to show the complete component tree. Every available category is ready to configure: cameras, recording, event management, server settings, Telegram integration, and more. The installation is complete.
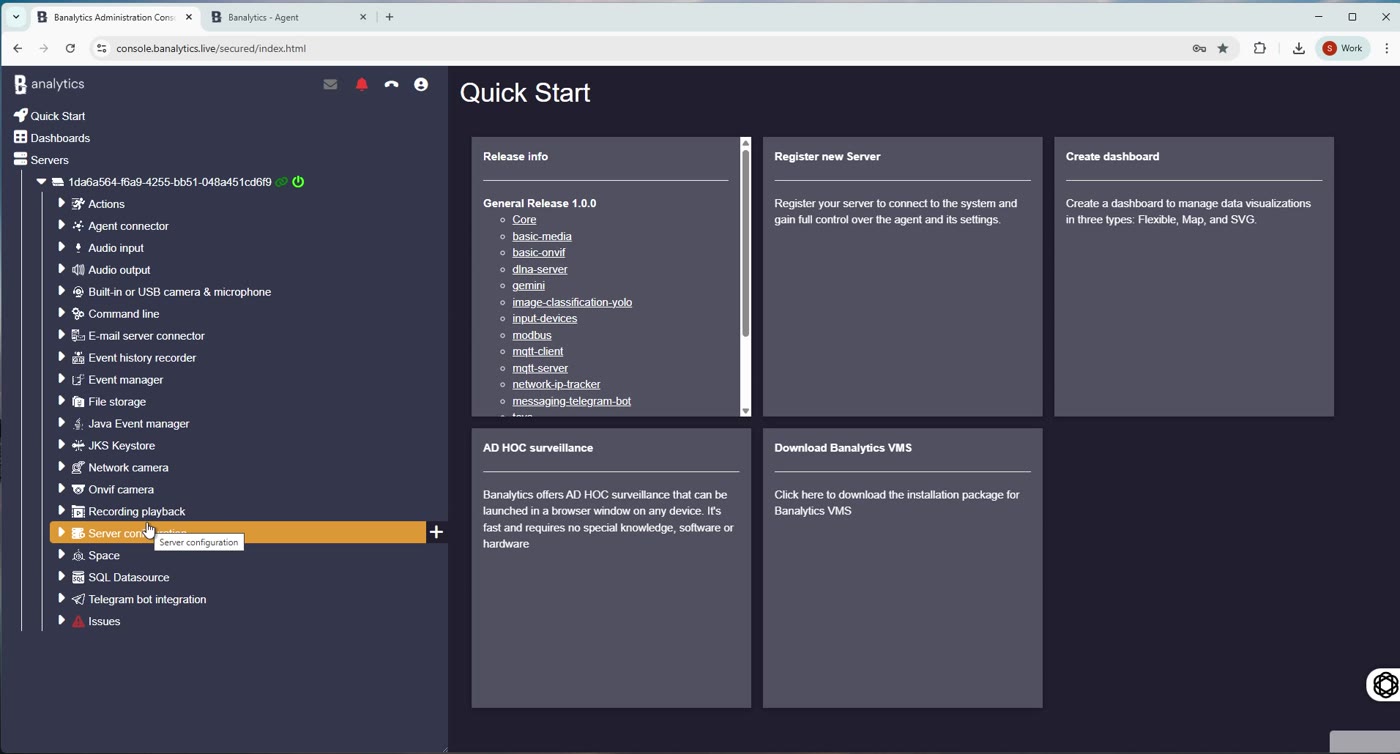
The full component tree in the left sidebar. All categories installed by the default modules are visible and ready to configure.
Server configuration components
Expand Server configuration in the left sidebar to see the built-in management components installed by the Banalytics Core module. These are available in every installation at no cost.
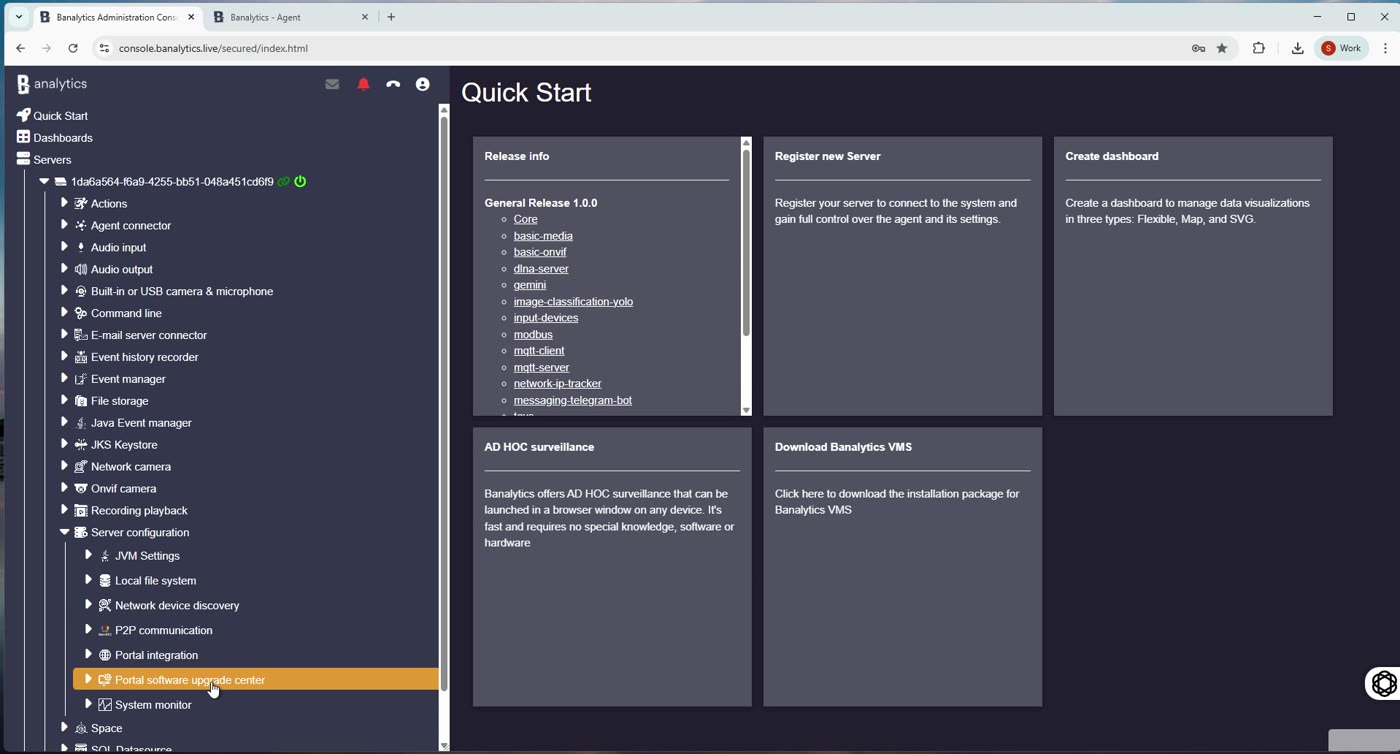
Server configuration expanded. Sub-components include JVM Settings, Local file system, Network device discovery, P2P communication, Portal integration, Portal software upgrade center, and System monitor.
Default modules and the module manager
Navigate to Server configuration and open Portal software upgrade center to reach the module manager. It lists every available module with its installed version and pricing. The following modules are active after a default installation:
| Module | Version | Pricing |
|---|---|---|
Banalytics core |
1.0.0 | Free |
Basic media package |
1.0.0-windows-x86_64 | Free for first server |
Basic ONVIF package |
1.0.0 | Free for first server |
Telegram bot integration |
1.0.0 | Free for first server |
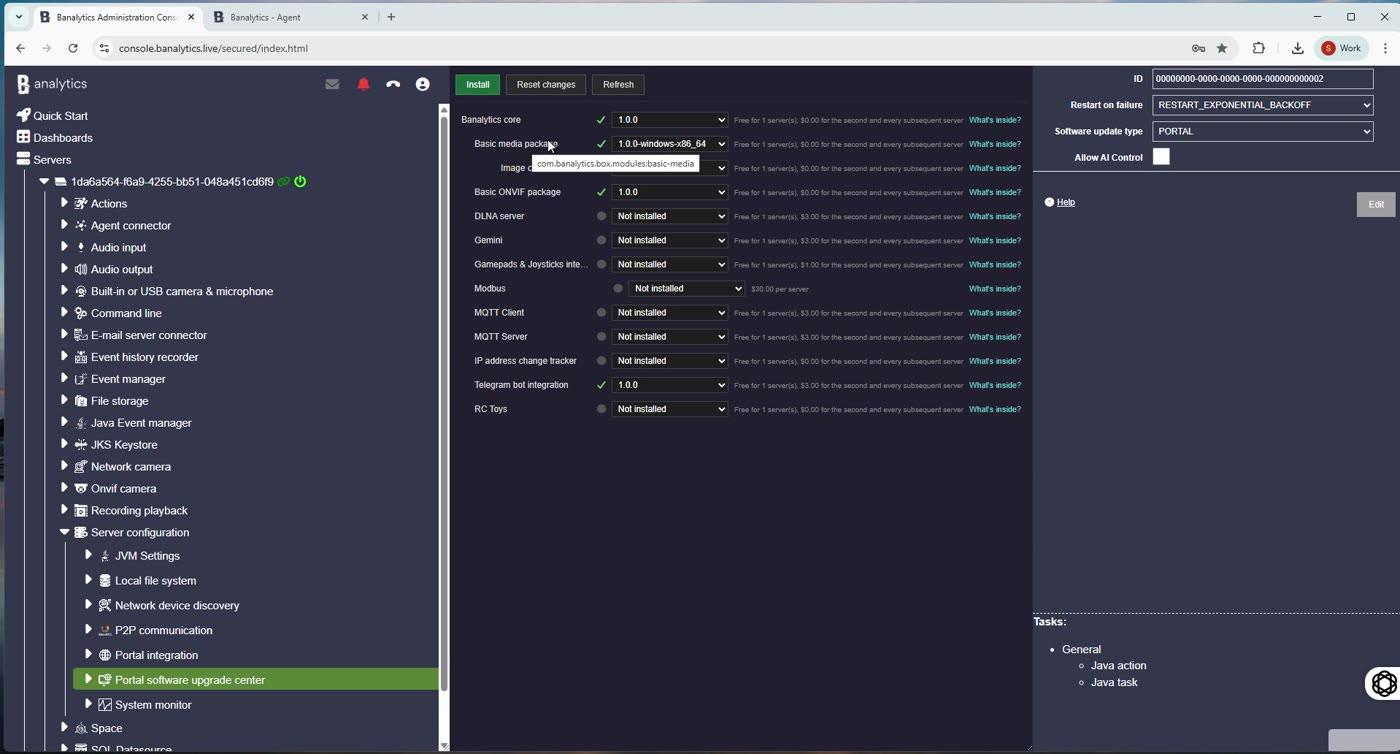
The Portal software upgrade center. Green checkmarks indicate installed modules. Additional modules such as DLNA server, MQTT, Modbus, and Image Classification (YOLO) can be activated individually.