
Access Sharing and P2P Communication Settings
Granting Access to a Single User
Granting Access to a Group of Users
In today's world, sharing access to video management systems (VMS) has become essential. Whether you're sharing access to a home surveillance camera with your spouse or granting role-based access in an organization where different users have specific responsibilities - such as monitoring or configuring - the ability to manage who can view and control which components is crucial. In Banalytics VMS, we implement P2P (Peer-to-Peer) communication, enabling direct communication between devices and users without the need for a centralized server or intermediary. This approach ensures a more secure, efficient, and flexible system for both individual and organizational use.
Banalytics VMS offers the capability to manage user access to various system components. You can grant access to individual users or groups of users, each with specific permissions tailored to their roles. This tutorial will guide you through the steps to configure access rights and share permissions, ensuring that users only have access to the components they need.
Granting Access to a Single User
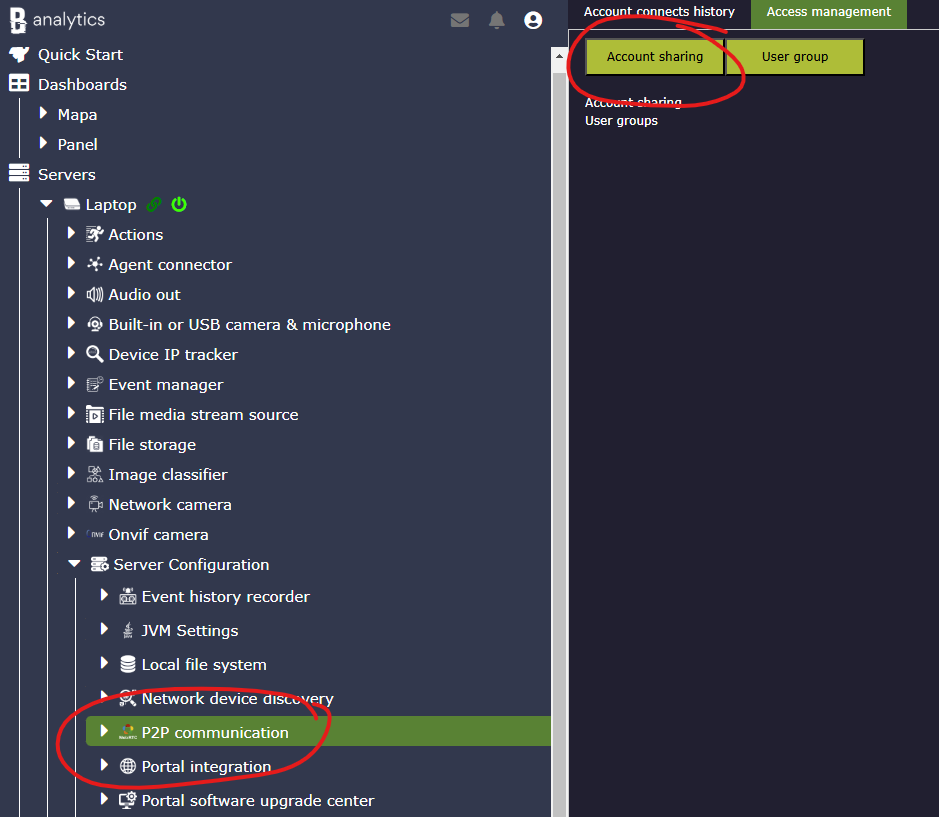
Go to the P2P Communication section under Server Configuration. Click the Account Sharing button. Enter the user's email address. This can be an email of a registered user and a new one.
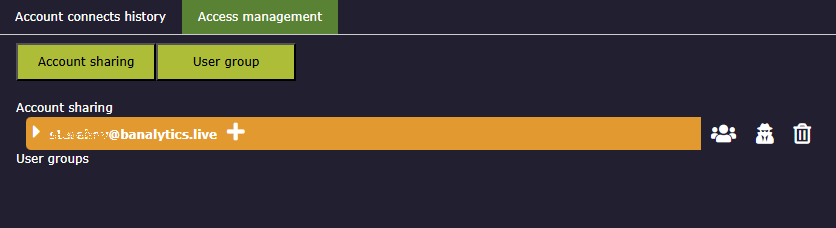
The email will appear under the Account Sharing section. Next to the email, you will see the following actions:
- Add user to a group.
- Resend connection password to the user.
- Delete sharing.
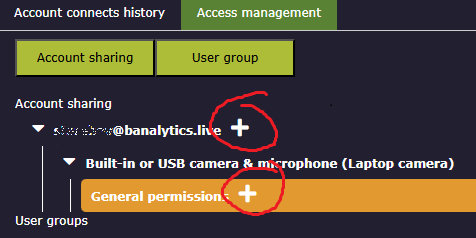
Click the icon next to the user's email to select a component you want to grant access to. For each component, you will see an option to delete access.
Click the icon next to the component to configure the access rights for the selected component. Define the specific permissions you wish to grant. Depending on the component, they can be:
- Action execution. This permission gives access to execute any task configured for the component. For example, play sound.
- Audio stream. This permission gives access to audio streams from the camera in real time.
- Read. This permission gives access to view component configuration.
- Start/Stop. This permission gives access to start/stop the component.
- Update. This permission gives access to update component configuration. Note: To update the configuration, you must grant permission to both "Read" and "Update".
- Video stream. This permission gives access to video streams from the camera in real time.
After granting access, the user will receive an email containing their connection password. Upon creating an account or logging in, the user will only see the components to which they have been granted access.
Granting Access to a Group of Users
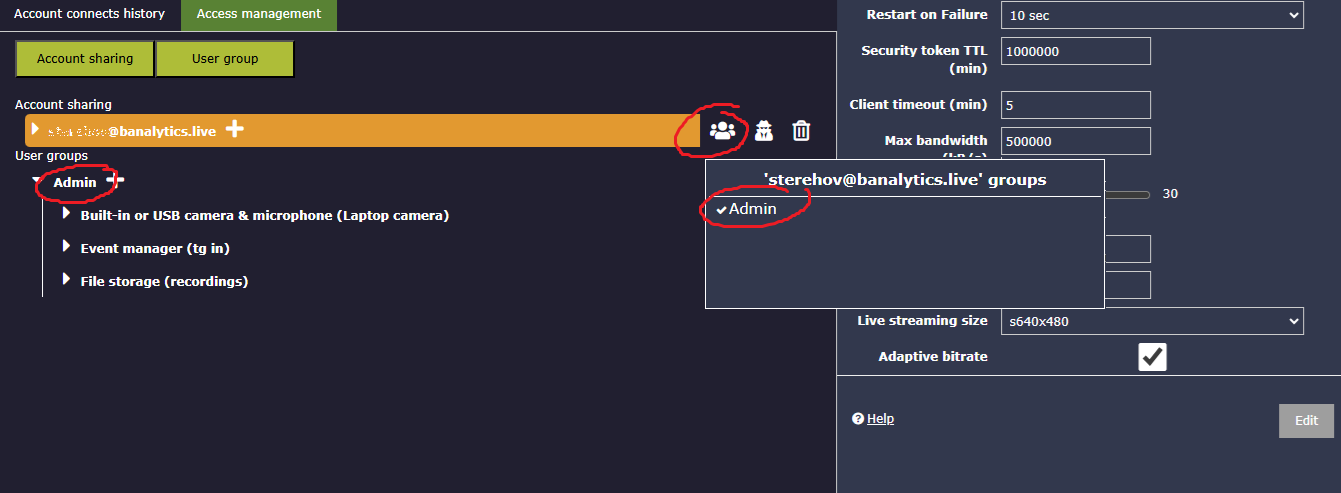
Click the User Group button. Enter the group name. This can be a role name - Visitor, Admin.
Configuring access for a user group is similar to granting individual access. Once you grant access to a component for the group, any new users you add to this group will automatically inherit the same permissions.
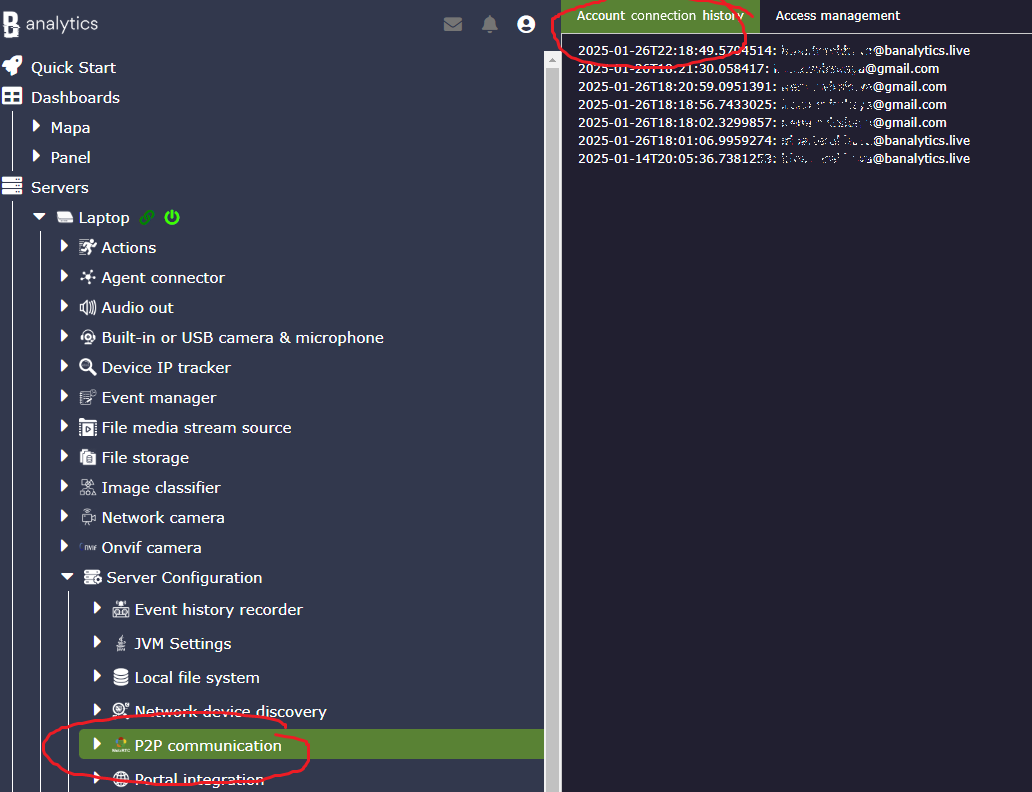
View Account Connection History
You can check who and when connected to your servers at the Account Connection History tab under P2P communication.
Configuration parameters
In addition to role configuration and access grant, the component allows configuring the connection settings for the current user. These settings relate to the browser's connection to the server.
| Value | Required (Yes/No) | Description | Default |
|---|---|---|---|
| uuid | Yes | A unique, automatically generated identifier for this component instance. This value is not editable. | |
| Restart on failure | Yes | Restart mode upon catching an error:
|
Default to 10 sec |
| Datasource | No | The SQL database used to store connection and telemetry data. Options are populated from the configured SQL Datasource component. | |
| Security token TTL (min) | Yes |
Security Token TTL (Time to Live) defines the lifespan of the security token issued to the user. This token authenticates and authorizes you in the Banalytics application. So, if you close the browser window and open again during this period, you won't need to re-login. A shorter TTL improves security by limiting the duration of a token's validity, forcing more frequent re-authentication. On the other hand, a longer TTL may reduce the frequency of authentication requests, but it may expose the system to potential security risks if the token is intercepted. |
Default to 15 min |
| Client timeout (sec) | Yes |
The Client Timeout sets the maximum time the connection from the browser to the Banalytics server can remain inactive before it is automatically terminated. The server will disconnect if the browser doesn't send any requests or interact with the Banalytics server during this period. A longer timeout may be appropriate when users expect active sessions for longer durations, such as monitoring systems in security operations. |
Default to 300 sec |
| Data Channel Buffer Max (Kb) | Yes | The maximum buffer size for P2P data channels. Helps control memory usage during high-throughput sessions. | Default to 2048 Kb |
| Media Packet Lifetime (ms) | Yes | Defines how long media packets are retained before being discarded. Useful for tuning performance on unstable or low-bandwidth networks. | Default to 2000 |
| Max bandwidth (kB/s) | Yes |
This parameter defines the maximum allowed bandwidth for server connection through the browser, measured in kilobytes per second (kB/s). It ensures that the video stream and data transmission do not exceed a specified limit, preventing network congestion. Set this value to optimize video streaming quality depending on available network resources. |
Default to 500000 kB/s |
| Reserved for file transmission (%) | Yes |
This setting defines the percentage of the total bandwidth reserved specifically for file transmission. The remainder of the bandwidth can be used for video streaming and other data. If your system requires frequent file transfers (e.g., recordings or snapshots), you can reserve a portion of the available bandwidth to ensure smooth transmission without affecting live streaming quality. |
Default to 30% |
| Max bitrate | Yes | The maximum bitrate (bits per second) setting defines the highest allowable bitrate for the video stream. It directly impacts the quality and resolution of the video stream. Higher bitrate values lead to better image quality but require more network resources. | Default to 300000 bps |
| GOP (Group of Pictures) | Yes | The GOP setting determines the interval between keyframes (I-frames) in the video stream. This is important for optimizing the video stream based on network conditions and the required level of video clarity.
|
Default to 100 |
| Max live streaming width | Yes |
This parameter sets the max resolution width of the live stream video. You can configure the stream to match the display or the user's connection capabilities. Lower resolutions use less bandwidth but may sacrifice video clarity. Adjust the resolution to match available bandwidth and desired video quality, especially for remote users with limited internet connections. |
Default to 800 |
| Adaptive bitrate | No |
Enabling adaptive bitrate allows the system to automatically adjust the video stream's bitrate based on the user's current network conditions. If the connection becomes slower, the bitrate will decrease to avoid buffering or interruptions. This feature is ideal for users with fluctuating network speeds, ensuring continuous playback without excessive buffering. Set this to "True" to enable adaptive bitrate. |
Default to YES |