
Capture Video with an ONVIF Camera
The Capture Video task is essential in Banalytics for enabling live video streaming, recording, and other advanced features from your ONVIF-compliant cameras. Unlike USB cameras, which are automatically configured upon connection, ONVIF cameras require you to manually add the Capture Video task to begin streaming. This guide walks you through the steps to properly configure the task and troubleshoot potential issues.
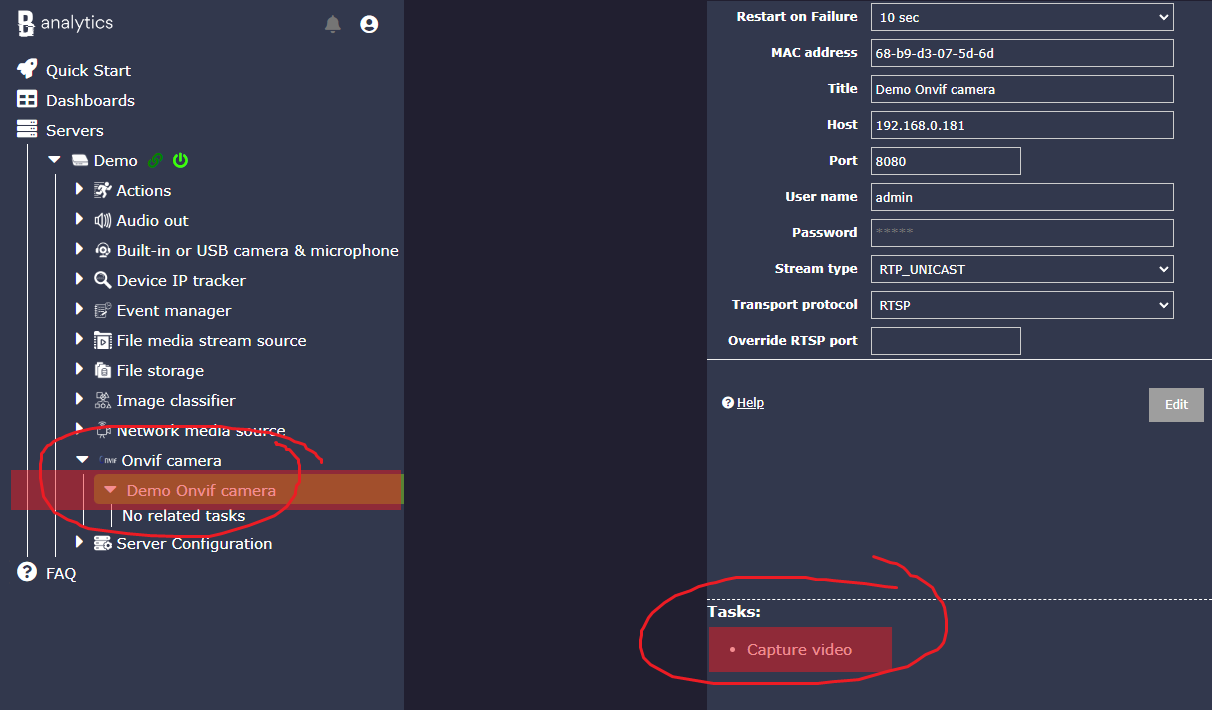
Navigate to your ONVIF camera in the Banalytics server view.
Click the camera title to open its configuration panel.
Click the Capture Video Task button located in the bottom-right corner.
Once saved, the video feed will appear in the preview pane. You can then start, stop, or delete the capture task as needed.
Note: Media profiles must be pre-configured on your camera's web interface before they appear as selectable options in the Banalytics configuration parameters.
To assist you with media profile configuration, we've prepared a YouTube tutorial that walks you through setting up media profiles tailored to different surveillance needs.
We recommend creating multiple media profiles for different use cases. RTSP is preferred over HTTP for real-time video streaming.
Remote Monitoring
Resolution: 1920x1080 (Full HD)
Encoding: H.264H
Mode: CBR
Frame Rate: 15-20 FPS
Bitrate: 2048 kbps
Motion Detection
Resolution: 1280x720 (HD)
Encoding: H.264B
Mode: VBRNormal
Frame Rate: 10 FPS
Bitrate: 1024 kbps
Low Bandwidth Environments
Resolution: 640x480 (SD)
Encoding: MotionJPEG
Mode: VBRPoor
Frame Rate: 5 FPS
Bitrate: 512 kbps
Troubleshooting Common Issues:
No video stream: Check the selected media profile and transport protocol.
Choppy video: Increase RT Buffer or lower resolution/FPS settings.
Configuration Parameters
| Value | Required (Yes/No) | Description | Default |
|---|---|---|---|
| uuid | Yes | A unique, automatically generated identifier for this component instance. This value is not editable. | |
| Restart on failure | Yes | Restart mode upon catching an error:
|
Default to 10 sec |
| Device | Yes | Select the ONVIF camera previously configured via the ONVIF Camera component. | Default to |
| Media profile | Yes | Select a media profile for your camera that Banalytics retrieves after connecting to it. | Default to |
| Rotate image | No | Rotates the video stream by the specified degrees (e.g., 90, 180, 270). Useful if the camera is mounted sideways or upside down. A value of 0 means no rotation. | Default to 0 |
| Disable audio | No | When enabled, the audio stream from the camera will not be captured or processed. Recommended if audio is unnecessary or to save bandwidth. | Default to Yes |
| RT Buffer (Mb) | Yes | Specifies the amount of memory (in megabytes) allocated for buffering real-time video frames. Increase this value for high-resolution or high-FPS cameras to reduce the risk of dropped frames. | Default to 40 |
| Max FPS (0 - disabled) | No | Sets the maximum frames per second to capture. Use this to limit bandwidth usage. A value of 0 disables the limit, using the FPS defined by the camera. | Default to 0 |